How to Build and Control a Vibrobot Using Only One Motor
Building a vibrobot—a simple creation with a vibrating motor and battery attached to a brush head—is a classic introduction to robotics. However, most vibrobots are uncontrollable, moving randomly. Thanks to a clever technique inspired by a research paper and brought to life by maker [Namaskar Mitro], you can now control the direction of a vibrobot using just one motor. The secret lies in mounting the motor at a specific angle and off-center, then rapidly reversing its direction. This guide will walk you through building and programming your own steerable vibrobot.
What You Need
- Brush head (e.g., a toothbrush or scrub brush head) – serves as the base
- Vibrating pager motor (or any small DC motor with an unbalanced weight)
- Battery pack (e.g., 2x AA or a LiPo cell) – powers the motor and microcontroller
- ESP-01F microcontroller – Wi-Fi enabled controller
- DRF8212 motor driver – to switch motor direction
- 3D-printed enclosure (or a small box) – houses the motor and electronics
- Soldering iron and wire
- Wi-Fi network – for remote control
- Optional: a printed path to test straight-line movement
Step-by-Step Build and Control Guide
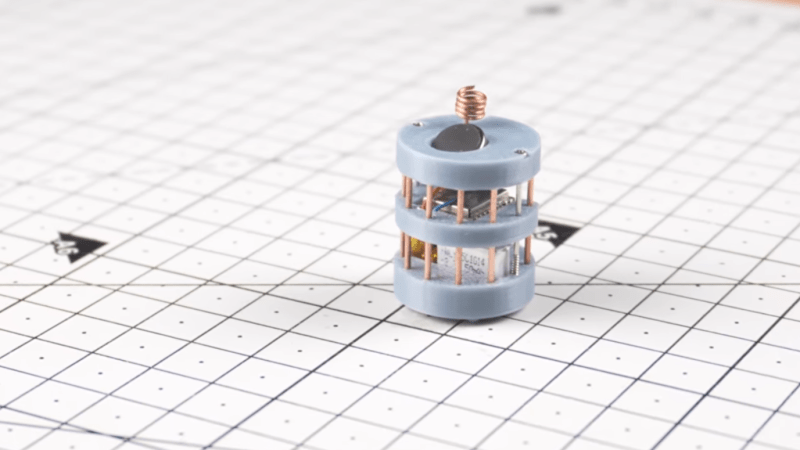
Step 1: Attach the Motor Enclosure at an Angle
Begin by mounting the vibrating motor inside the 3D-printed enclosure. The key is to angle the motor so that its shaft is not parallel to the base. According to the research paper, an angled motor causes the robot to rotate. Secure the enclosure to the brush head using glue or screws, ensuring it sits slightly off-center relative to the brush head’s center of mass. This off-center placement makes the robot move in circles when the motor runs in a single direction.
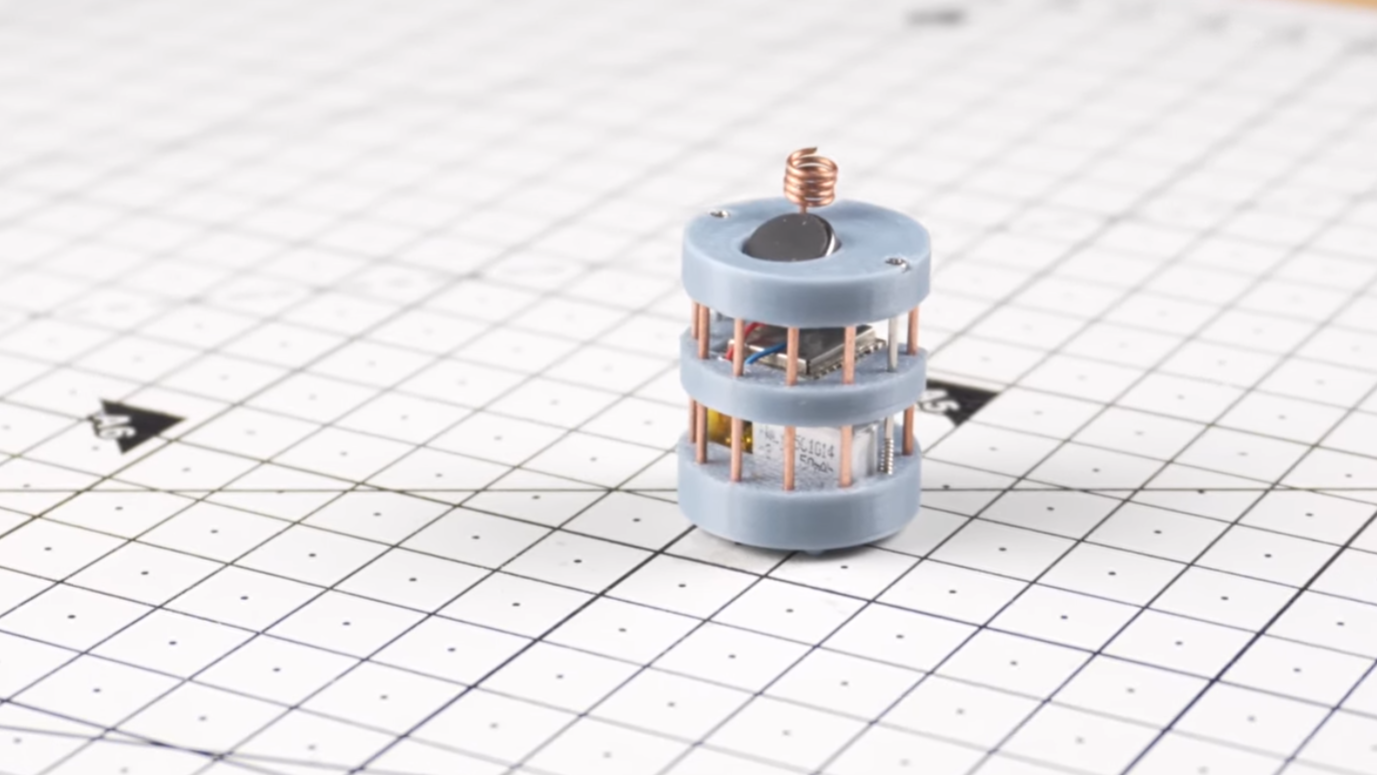
Step 2: Wire the Electronics
Connect the DRF8212 motor driver to the ESP-01F microcontroller. The driver can reverse the motor’s rotation by swapping the polarity. Wire the motor driver’s control pins to two GPIO pins on the ESP-01F (e.g., GPIO0 and GPIO2). Connect the motor to the driver outputs. Ensure the battery pack supplies both the microcontroller and the motor driver (a common ground is essential). Solder all connections and insulate them.
Step 3: Program the ESP-01F to Switch Direction
Write a simple program (using Arduino IDE or similar) that toggles the motor direction every 250 milliseconds. This rapid switching produces a series of short arcs that approximate a straight line. Use a loop: set motor one way, delay 250 ms, then reverse. Include a Wi-Fi handler to accept commands remotely. Upload the code to the ESP-01F.
Step 4: Test Straight-Line Movement
Place the vibrobot on a flat surface and power it on. It should move in a relatively straight line, though some erratic movement is normal. Adjust the 250 ms timing if the robot drifts too much. For more precision, you can switch directions faster (e.g., 100 ms) or slower, depending on the motor’s vibration strength and the brush head’s bristles.
Step 5: Implement Remote Control Over Wi-Fi
Use the ESP-01F’s Wi-Fi capabilities to send commands from a smartphone or computer. Set up a simple web server on the ESP-01F that listens for direction commands (e.g., forward, left, right). When a command comes in, adjust the duty cycle or timing of motor direction switching to steer the robot. For example, holding one direction longer than the other causes a turn.
Step 6: Fine-Tune Path Following
To follow a traced path, you may need to calibrate the switching interval based on the path’s curvature. The robot’s movement will still be somewhat erratic, as noted by [Namaskar Mitro], but it can approximate a line. Experiment with different mounting angles and off-center distances. A steeper angle increases rotation speed, while a larger offset increases turning radius.
Tips for Success
- Mounting matters: Use a 3D-printed enclosure to hold the motor at a precise angle. If you don’t have a 3D printer, build a small wedge from cardboard and hot glue.
- Test on a smooth surface – carpet can dampen vibrations and reduce control.
- Battery weight affects balance; position the battery on the opposite side of the motor for stability.
- Experiment with different brush heads – softer bristles may give smoother arcs.
- For finer control, consider adding a potentiometer to adjust the switching frequency dynamically.
- If the robot does not move straight, try increasing the switching rate or adjusting the motor angle by a few degrees.
With these steps, you’ll have a fully controllable vibrobot that uses only one motor—a perfect project for expanding your robotics skills. Happy building!
Related Articles
- How Gene Folding Influences Neighboring Genes: A Step-by-Step Guide to DNA's Ripple Effect
- AI Agents Get Their Own Secure Desktops: Amazon WorkSpaces Eliminates Legacy Application Barriers
- Bohmian Mechanics: A Realistic Take on Quantum Reality and How to Test It
- Cyclone Maila's Wrath: Landslides Devastate Papua New Guinea's Gazelle District
- Mars Helicopter Evolution: JPL Engineers Achieve Rotor Technology Breakthrough
- SpaceX Nighttime Launch: 45 Satellites Sent to Orbit from California – Key Questions Answered
- How to Navigate the US Space Force's Golden Dome Space-Based Interceptor Program
- 7 Key Insights into How Anion Exchange Boosts CO₂ Capture in Polyionic Liquids